How to Record and Manage a meeting in Microsoft Teams
Description
Any Teams meeting or call can be recorded for future viewing. The recording captures audio, video, and screen-sharing activity, and you can share it securely across your organization.
A recording will expire and be automatically deleted after a set period of time. The length of time it’s available is set by your admin, but you can change the expiration date of any given recording.
Notes:
- Microsoft Teams recordings won’t capture whiteboards, annotations, or shared notes, and also won’t include videos or animations embedded in PowerPoint Live presentations.
- When you view a meeting recording, you’ll see no more than four people’s video streams at once.
Important:
- As of August 2022, Microsoft Teams meeting recordings are no longer saved to Microsoft Stream. All recordings are now saved to OneDrive and SharePoint.
- If your organization still uses Stream, please note:
- After the recording has stopped, it’s processed (which could take a while) and saved to Microsoft Stream, and then it’s ready to play.
- The person who started the recording receives an email from Microsoft Stream when the recording is available. It also shows up in the meeting chat—or in the channel conversation if you’re meeting in a channel.
- If an admin has set a company policy for saving to Microsoft Stream, you need to accept it before starting the recording.
Start recording
When you start recording a meeting, you also turn on live transcriptions
- Start or join the meeting.
- Go to the meeting controls and select More actions More options button > Start recording.
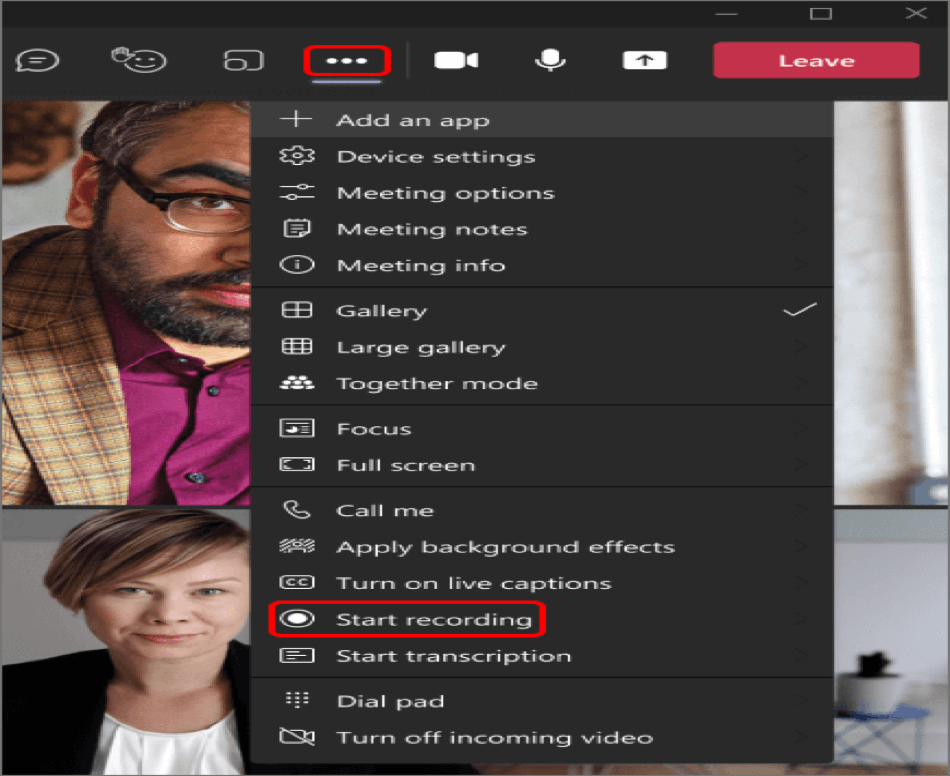
Everyone in the meeting gets notified that recording and transcription have started.
Notes:
- You can’t make multiple recordings of the same meeting at the same time. If one person starts recording a meeting, that recording will be stored on the cloud and available to all participants.
- Meeting participants have the option of viewing the transcription during the meeting.
Stop recording
- Go to the meeting controls and select More actions More options
- Choose one of the following:
- Stop recording: Stops the recording and live transcription.
- Stop transcription: Stops just the live transcription. The recording continues until you select Stop recording.
Find recordings
Recordings are available in different places depending on the type of meeting.
- The recording is processed and saved to SharePoint if it was a channel meeting or OneDrive if it was any other type of meeting.
- Go to My files in your OneDrive or SharePoint site and view as a list
- The meeting recording shows up in the meeting chat or channel conversation (if you’re meeting in a channel).
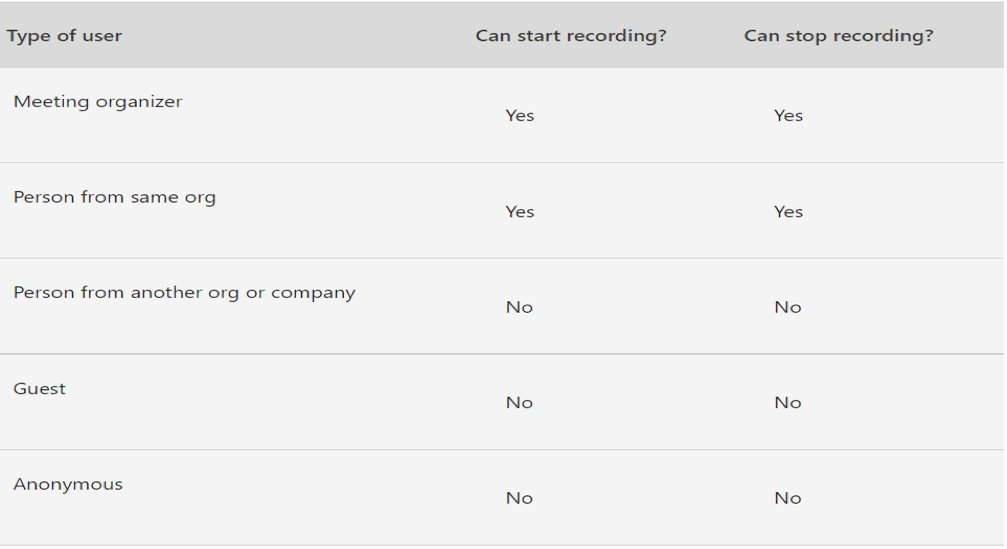
Who can start or stop a recording?
Anyone who meets the following criteria can start or stop a recording, even if the meeting organizer isn’t present.
Notes:
- Recording continues even if the person who started the recording has left the meeting.
- The recording stops automatically once everyone leaves the meeting. If someone forgets to leave, the recording automatically ends after four hours.
- If one of the participants has a policy for compliance recording, the meeting will be recorded according to the policy even if that participant is from another org.
Manage the expiration of a meeting recording
Your admin’s settings determine whether (and when) a recording will expire. If your recording has an expiration date, you’ll see a message indicating that when the recording pops into the meeting chat after the meeting ends.
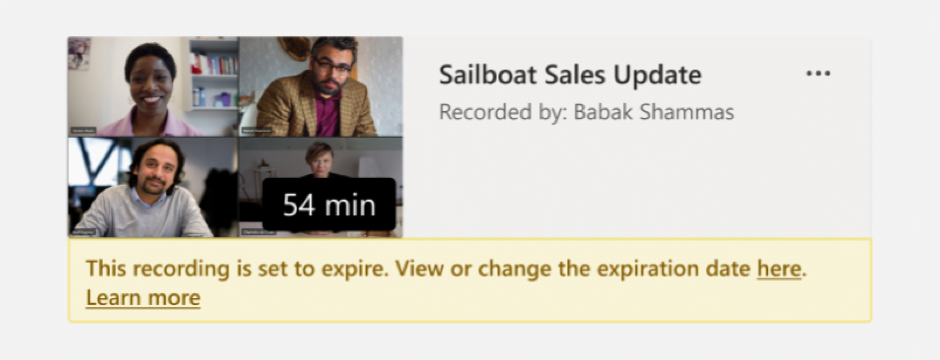
Open the details pane to view or change the expiration date.
There are a couple of different ways to get there:
- Click on the recording to open it in your browser. Once the browser page has opened, select Info icon in the upper right to open the details pane.
- Go to My files in your OneDrive or SharePoint site and view as a list. Mouse over the recording in question, select Show actions (the three vertical dots to the right of the file name), and then choose
When the details pane is open, look for Expiration date. Here’s where you’ll see the date that’s currently set.
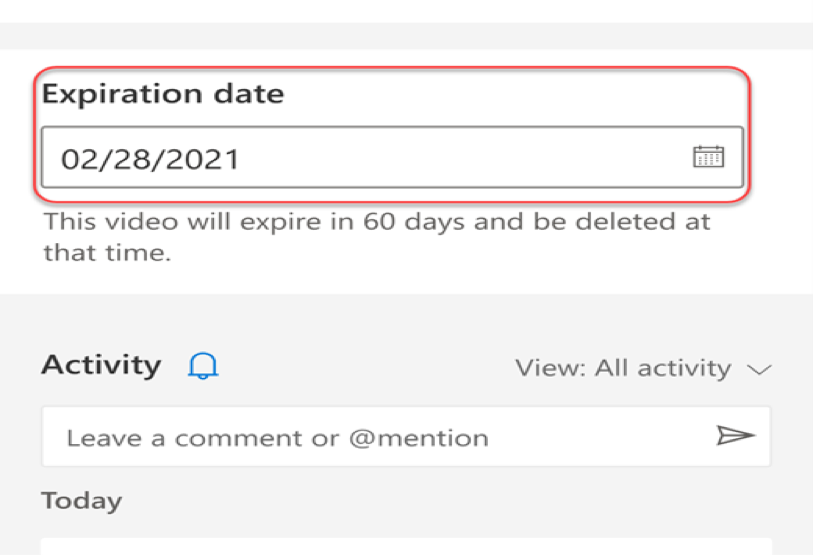
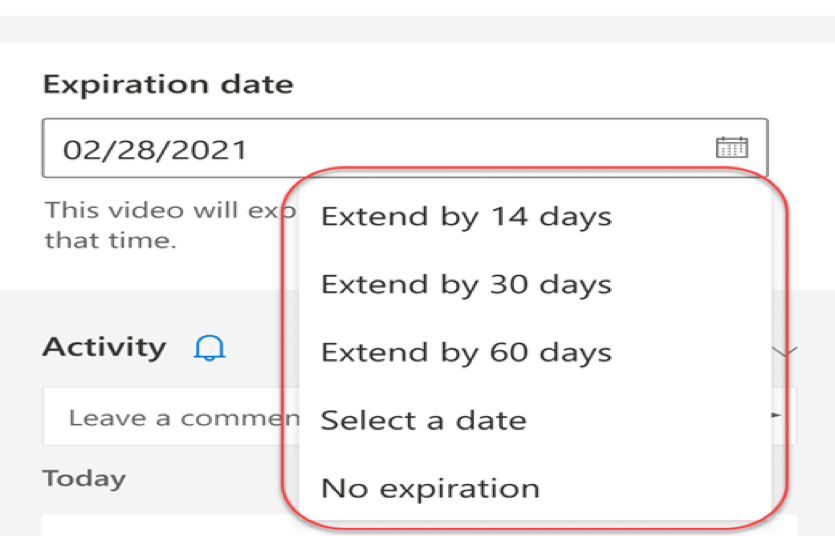
Open the drop-down to see your options for changing the date. Extend the recording’s availability for a certain number of days or pick a specific date on the calendar. You can also choose No expiration if you don’t want it to be deleted.
Notes:
- The message indicating that your recording will expire will persist on the recording in the chat even if you remove the expiration date. But don’t worry—if you’ve selected No expiration, it won’t expire.
- The owner of the recording will get an email when it expires. At that point, they’ll have up to 90 days to recover it from the recycle bin. Once recovered, the recording will no longer expire automatically.
- Watching the recording won’t affect the expiration date.
Author: Fahad Raza
PDF Version